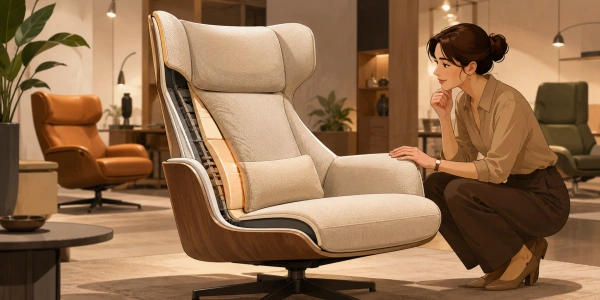
How to reupholster a chaise lounge chair is a question many DIY enthusiasts and furniture lovers ask when giving an old or tired piece a fresh, stylish update. With the right tools, materials, and step-by-step guidance, you can transform your chaise lounge into a comfortable, elegant, and long-lasting piece that fits perfectly in your living space or complements professional hospitality settings. This guide walks you through the essential steps, from removing old fabric to finishing touches, ensuring your project is both satisfying and successful.
Gather Your Tools and Materials for the Project
Before diving into this refreshing project, let’s gather everything you’ll need. You might find that having all your tools ready makes the process feel like a fun weekend activity rather than a chore. For a successful reupholstering chaise lounge chair experience, you’ll need a staple gun, staples, fabric scissors, a screwdriver, and your chosen upholstery fabric. Don’t forget a pair of pliers for removing old staples—trust me, they’re a lifesaver.
Tool Checklist for a Smooth Start
Here’s a quick list to check off: staple gun (manual or electric works fine), 1/4-inch staples, fabric shears, a flathead screwdriver, needle-nose pliers, and a measuring tape. For the fabric, consider a durable option like polyester or cotton blend, especially if you’re sourcing from a wholesale supplier. If you’re wondering how to reupholster a chaise lounge chair without stress, start with quality materials. One user shared that using a heavy-duty staple gun saved them hours of frustration. Also, grab some batting if your cushion feels flat—this adds that plush feel we all love.
Remove the Old Fabric and Assess the Frame
Start by flipping your chaise lounge over and carefully removing the old fabric. This step is where you get to see the bones of your piece and decide if any repairs are needed. It’s a bit like peeling off an old coat to reveal something with potential.
Careful Removal and Frame Inspection
Use your screwdriver to pry up the old staples, then pull them out with pliers. Take your time—you don’t want to damage the wood frame. As you remove the fabric, note how it was attached; this will guide you when you install the new one. For those in the chaise lounge wholesale business, this is a great moment to check if the frame is solid or needs reinforcement. A common misunderstanding is that all frames are perfect underneath, but sometimes you’ll find a loose joint. Tighten any screws or add wood glue as needed. This assessment ensures your reupholstering chaise lounge chair project lasts for years.
Cut and Prepare Your New Fabric
Now for the creative part—laying out and cutting your new fabric. This is where your chaise lounge starts to feel like a custom piece. Measure twice, cut once, as the saying goes, and you’ll be set.
Tips for Cutting Fabric for a Chaise Lounge
Lay your fabric on a clean, flat surface, pattern side up. Use the old fabric pieces as a template, adding an extra 2-3 inches around each edge for stapling. If you’re working with a patterned fabric, make sure the design aligns nicely across the seat and back. For a full guide on how to reupholster a chaise lounge chair, this step is crucial—it prevents awkward mismatches. A friendly tip: if you’re buying from a wholesale supplier, order a little extra fabric for mistakes or future repairs. One DIYer mentioned that using chalk for marking made cutting much easier.
Attach the New Fabric to the Chaise Lounge
Here’s where the magic happens—attaching your fresh fabric to the frame. Start from the center and work your way out, keeping the fabric taut but not stretched to the point of distortion. It’s like making a bed, but with staples.
Stapling and Tightening Techniques
Begin by stapling the fabric at the center of one side, then pull it tight and staple the opposite side. Work your way around, placing staples about an inch apart. For curved areas, make small pleats or snips in the fabric to avoid bunching. If you’re learning how to reupholster a chaise lounge chair, remember that patience pays off. A common mistake is stapling too close to the edge, which can cause the fabric to tear. Instead, leave a half-inch gap. For a professional look, use a rubber mallet to tap staples flush with the frame. This technique is often recommended by experts in the chaise lounge wholesale industry for durability.
Finish with Details and Final Touches
The final step is all about the finishing touches that make your chaise lounge look polished and ready for relaxation. Add trim, piping, or new cushion covers to complete the transformation.
Final Inspection and Enjoyment
Check all edges for loose staples and trim any excess fabric with scissors. If you added batting, fluff it up for a cozy feel. For those reupholstering a chaise lounge chair, this is the moment to step back and admire your work. A simple way to enhance the look is to add decorative nails along the bottom edge—a trick used by many in the wholesale community. Finally, place your chaise lounge in its spot and enjoy the fruits of your labor. If you’re curious about more projects, check out this guide on reupholstering chairs from DIY Network for extra inspiration. Remember, every chaise lounge has a story, and you’ve just given yours a beautiful new chapter.